Virtualmin installation guide on Debian
As we have mentioned before Virtualmin is a feature rich control panel. We will talk about initial installation of Virtualmin step by step and then we will make some security tweaks.
Assuming we have an already a base operating system installed in a VPS or Dedicated Server the very first commands we want to run are of course for OS update. In our example we will also install screen command and we will reboot the server.
After that we can continue with some basic configurations regarding OS locales and time.
First we are running the locales configuration tool:
Then we select "en_US.UTF-8 UTF-8" if it isn't already and then we configure timezone (in our example, Greece time) one way to do this is the following:
Then we are all set to proceed with Virtualmin installation, please note that we are running the installation in screen, as it is generally a good practice for long running tasks.
Installation of PHP extensions and Apache modules. Although the most common ones are already installed by virtualmin we can extend our list to be more complete. A suggestive list follows, adjust according to your needs.
We also need to enable some jails by setting "enabled = true" each "jail", some of the jails to enable for additional security are:
See also:
Necessary installation steps
Some steps (eg: adjusting time, may not be that "necessary" but it's preferable to be taken before Virtualmin's installation)apt-get update && apt-get -y dist-upgrade && apt-get install screen && apt-get --purge autoremove && apt-get autoclean && reboot dpkg-reconfigure locales ln -sf /usr/share/zoneinfo/Europe/Athens /etc/localtime
export TZ=Europe/Athens
apt-get install -y ntp ntpdatescreen
cd /root
wget http://software.virtualmin.com/gpl/scripts/install.sh
/bin/sh install.shapt-get install -y php5-memcache php5-memcached memcached php-apc php-pear php-auth php5-mcrypt mcrypt php5-gd php5-imagick imagemagick php5-curl php5-intl php5-ps php5-pspell php5-recode php5-snmp php5-sqlite php5-tidy php5-xmlrpc php5-xsl
apt-get install -y mod-security-common
a2enmod expires
a2enmod rewrite
a2enmod deflateOptional steps and security:
Securing /tmp mount
There quite a few techniques you may achive one is by creating a 512MB file and using it as /tmp partition:dd if=/dev/zero of=/tmp_block_file bs=1024 count=524288
mke2fs j /var/tmp_block_file
mv /tmp /tmp_backup
mkdir /tmp
mount -o loop,noexec,nosuid,rw /tmp_block_file /tmp
chmod 1777 /tmp
cp -R /tmp_backup/* /tmp/
rm -rf /tmp_backup
mv /var/tmp /var/tmp_backup
ln -s /tmp /var/tmp
cp -R /var/tmp_backup/* /var/tmp/
rm -rf /var/tmp_backupChanging SSH port
We may change the SSH port to avoid a serious amount of login attempts from botnets. In our example we are changing the port from 22 to 10022 and we are disabling the DNS lookup which can sometimes add extra delay while establishing connections.sed -i 's/Port 22/Port 10022/g' /etc/ssh/sshd_config
echo UseDNS no >> /etc/ssh/sshd_config
service ssh restart"Jail" FTP users
We can configure Virtualmin to permit FTP users browse only their home directory by selecting "Active" under the path: Limits and Validation > FTP Directory Restrictions > Active - Users' home directories (First image)Mail Username format
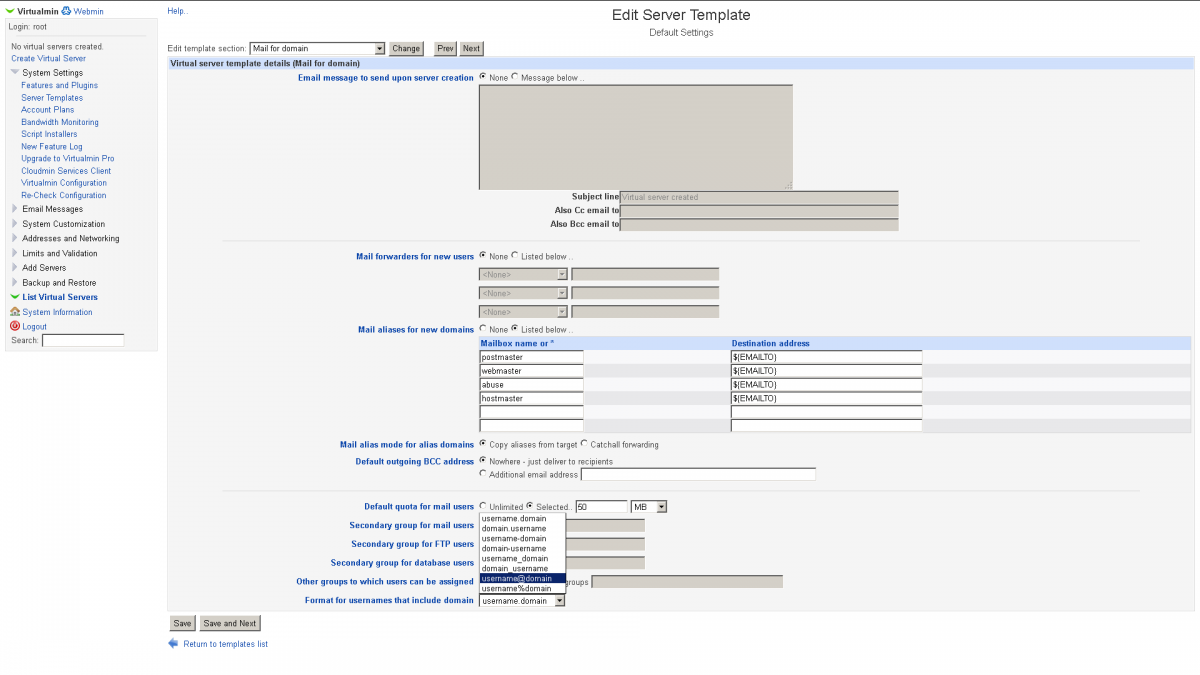
We can select the more readable "username@domain" format under the path: System Settings > Server Templates > Mail for domain > Format for usernames that include domain (Second image)Adding RBL to Postfix
sed -i 's/reject_unauth_destination/reject_unauth_destination reject_rbl_client zen.spamhaus.org/g' /etc/postfix/main.cf
service postfix restart
Installing fail2ban
apt-get install fail2ban- [ssh-ddos]
- [apache]
- [apache-noscript]
- [apache-overflows]
- [proftpd]
- [postfix]
- [sasl]
touch /etc/fail2ban/jail.local
echo '[ssh]' >>  /etc/fail2ban/jail.local
echo 'enabled  = true' >>  /etc/fail2ban/jail.local
echo 'port     = 10022' >>  /etc/fail2ban/jail.local
service fail2ban restartScreenshots:


